How to assemble Category 6 Flat Cable
Stranded Shielded RJ45 plug How To
How to Assemble a Category 6 Flat Shielded Plug
Materials Required
CAT6 Flat Shielded Cable
CAT6 Flat Shielded Plug
Stripper
Cutters
RJ45 Crimp Tool
Try VPI's CRIMP-RJ45 Crimp Tool – it Cuts, Crimps and Strips.
CAT5e Cable Tester
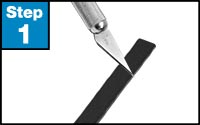
Step 1. Lay the end of your cable on a flat surface. Using an x-acto knife, very carefully score the jacket across the cable 1" from the end.
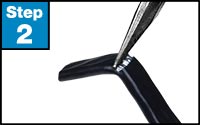
Step 2. Flex the cable where you scored it and use needle nose pliers to peel off the jacket. Use wire cutters to trim any excess that does not peel off.
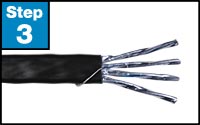
Step 3. Expose 1" of the shielded wire conductors. Wrap the drain wire around the cable.
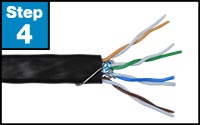
Step 4. Using a wire cutter, carefully clip the foil shield insulation around the each twisted pair and remove it as close to the cable jacket as possible. Do not remove any insulation from the conductors.
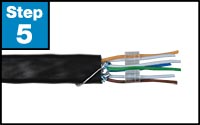
Step 5. Untwist the pairs to within 1/8" of the jacket. Arrange the wires according to TIA/EIA 568A or 568B standards. Slide the 1st and 4th pair of wires into each side of the cross-shaped loading bar, with the 2nd and 3rd pair respectively touching the top and bottom crevices.
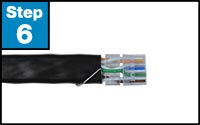
Step 6. Flatten and align the wires. Make one straight cut across all the conductors, removing approximately 1/2". Insert wires into horizontal loading bar. Trim excess wires.
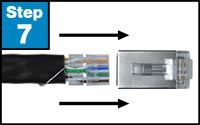
Step 7. Insert prepared cable into plug.
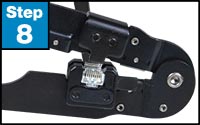
Step 8. Insert the plug into a crimp tool aligned to the slotted jaw. Firmly squeeze the handles to set the contacts.
Step 9. Test the cable using a cable tester to check for shorts, opens or miswires.