 |
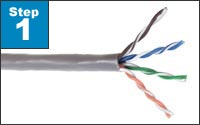
Step 1. Carefully strip the jacketing from the cable to expose 1" of the insulated wire conductors. Do not remove any insulation from the conductors. |
| Step 2. Untwist the pairs to within 1/8" of the jacket. Arrange the wires according to TIA/EIA 568A & 568B standards. Flatten and align the wires. Make one straight cut across all the conductors, removing approximately ½" to ensure the ends are of equal length. |
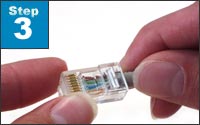 |
Step 3. Hold the connector in front of you with the locking tab down. Orient the wires so connector Pin 1 aligns with cable Pin 1, etc. Pin 1 is on the far left. Slide the wires into the CAT5e connector. The cable jacket should extend into the connector about 1/4" for strain relief. |
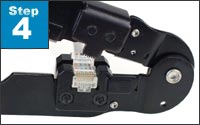 |
Step 4. Insert the plug into a crimp tool. Firmly squeeze the handles to set the contacts and secure the cable.
|
| Step 5. Test the cable using a cable tester to check for shorts, opens or miswires. |